Friday, June 26, 2009

Add simple border to your photographs using Irfan View

To add simple border to your photographs using Irfan View follow the steps below.

The border option in Irfan View is little hidden.

Step 1: Open Irfan View and Click on File --> Batch Conversion/Rename option or shortcut key 'b'. This will open 'Batch Conversion' form as shown below.
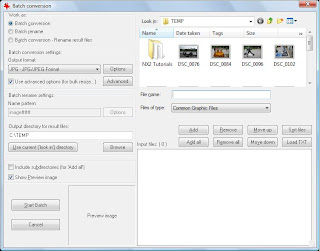

Step 2: Check the 'Canvas Size' option which is in the middle column and click on settings. This will open a new dialog as shown below.
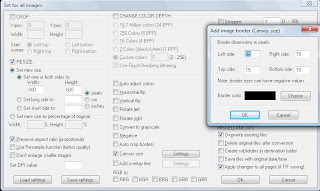


Enter the desired border thickness and choose the color for your border and then click OK.


Step 3: Now click on 'Start Batch' and the images with border will be saved on the folder mentioned in 'Output directory for result files'.

Wednesday, June 24, 2009

Selective Coloring using Nikon Capture NX2

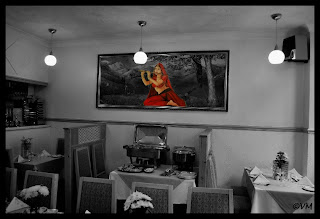
Selective coloring can be done by converting the image to Black and White and then recover the color in the area you would like.

Step 1: Open the picture you would like to apply selective coloring.


Step 2: Now from the menu select, Filter --> Black and White Conversion. This will convert the image to Black and White.


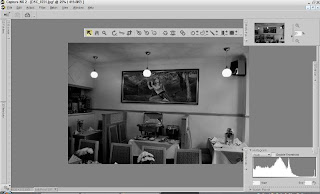
Step 3: Now select the minus brush as shown in the figure below.


The minus brush is used to recover the color from the black and white conversion. You can select the brush size according to your need.


Step 4: Now move the brush over the area where you want to recover the color.


P.S. Initially you will face problem in applying selective coloring and if you want to remove the coloring then you can use add brush to remove the recovered color.