The border option in Irfan View is little hidden.
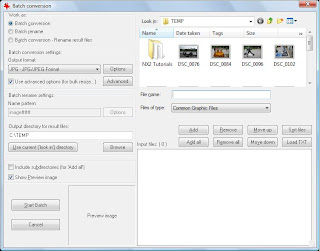
Step 1: Open Irfan View and Click on File --> Batch Conversion/Rename option or shortcut key 'b'. This will open 'Batch Conversion' form as shown below.

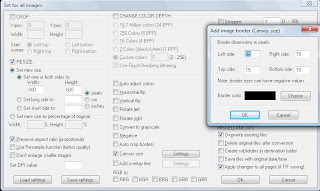
Step 2: Check the 'Canvas Size' option which is in the middle column and click on settings. This will open a new dialog as shown below.

Enter the desired border thickness and choose the color for your border and then click OK.
Step 3: Now click on 'Start Batch' and the images with border will be saved on the folder mentioned in 'Output directory for result files'.

No comments:
Post a Comment